How to Connect Car Scanner to OBDCheck BLE & OBDCheck BLE+ on iOS
This guide will walk you through the complete process of connecting your Veepeak OBD2 scanner with the "Car Scanner ELM OBD2" app on your iOS device (iPhone/iPad). The entire setup procedure consists of three main parts: first, properly plugging in the hardware and preparing Bluetooth; second, downloading and completing the initial configuration of the app; and finally, establishing the Bluetooth connection from directly within the app.
Please follow these steps in order to ensure the scanner successfully communicates with your vehicle's computer so you can begin vehicle diagnostics.

Step 1: Plug In Device & Prepare Bluetooth
Plug in the device and turn on the car ignition. Go to your iOS device's Bluetooth settings and check if "VEEPEAK" appears. Do not connect to it here. Please see the notes below:
- Note: This device uses Bluetooth LE for iOS devices. Please do not pair with "VEEPEAK" in the iOS Bluetooth settings. You will connect to it directly within the app by following the upcoming instructions.
- Tip 1: If you accidentally tap on "VEEPEAK" in the Bluetooth settings, it may lead to an "unsupported device" error, and "VEEPEAK" will disappear from the list. To resolve this, restart your iOS device, and it will show up again. You can then proceed to the next step.
- Tip 2: We have recently noticed that for a few batches, when trying to connect with "VEEPEAK" from the iOS Bluetooth settings, a PIN will pop up. The device will connect and then become “not connected” shortly after the PIN is entered. Don’t worry; you can ignore the device status here and just launch the App to connect. (This issue has been fixed for current and future batches).
Step 2: Download the Correct App
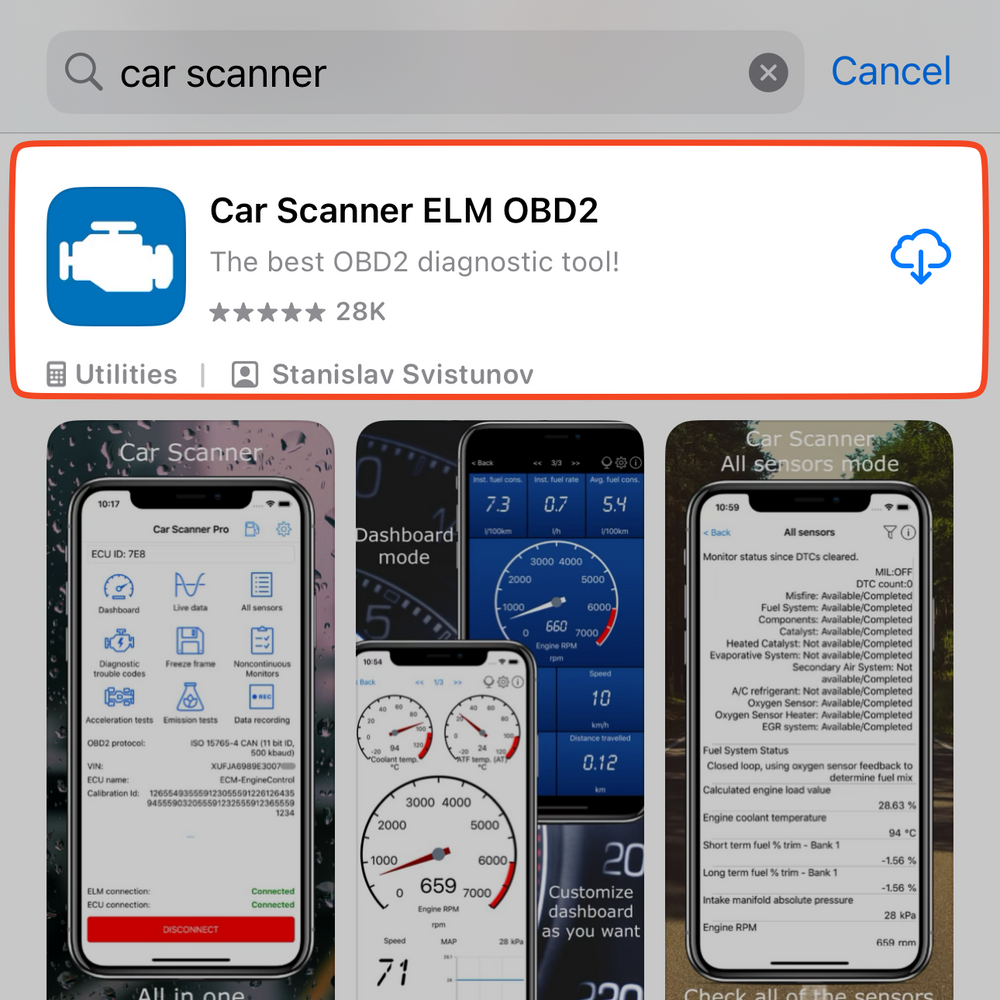
Search for and download the "Car Scanner" App from the App Store. Be sure to get the correct one, “Car Scanner ELM OBD2”, as shown in the app icon, and be aware of advertisements for apps with similar names.
Step 3: Grant Network Permissions
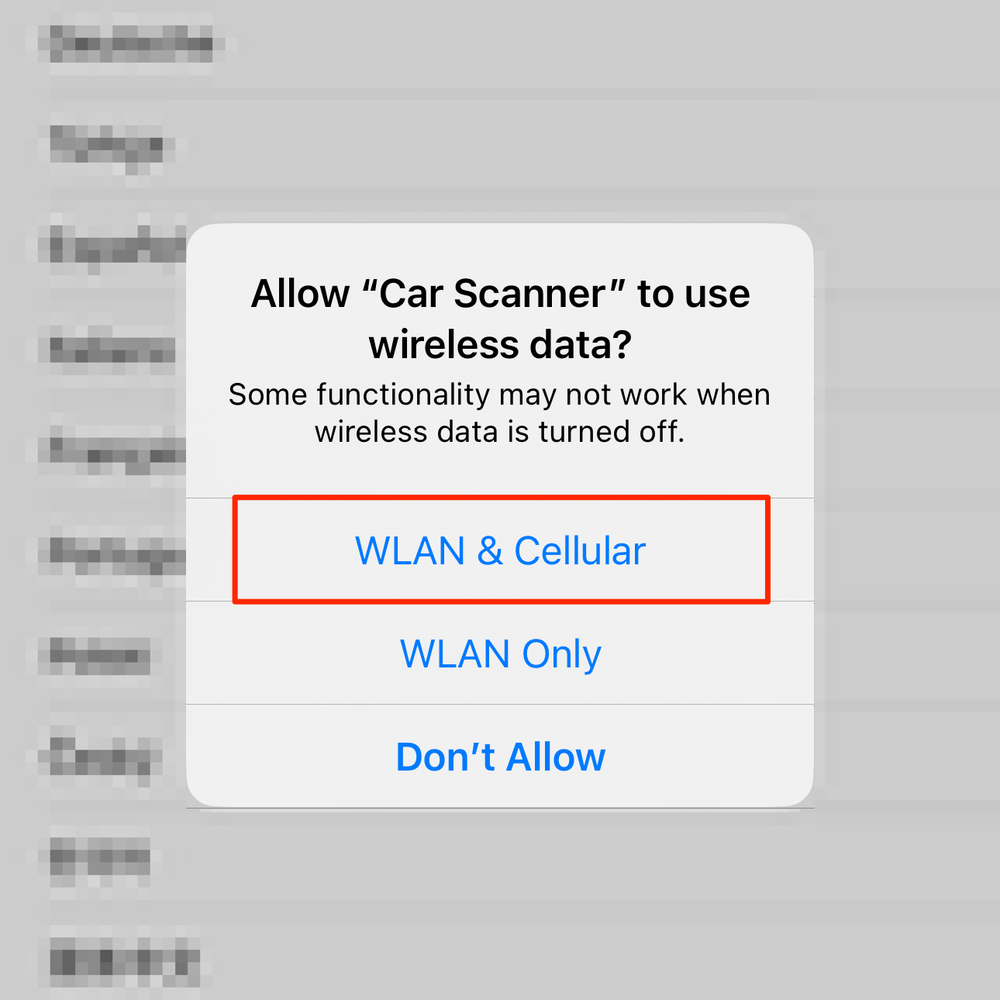
Launch the Car Scanner App. You will be asked to grant permission for wireless data usage (typically, you should choose “WLAN & Cellular”).
Step 4: Initial App Setup & Vehicle Profile Selection
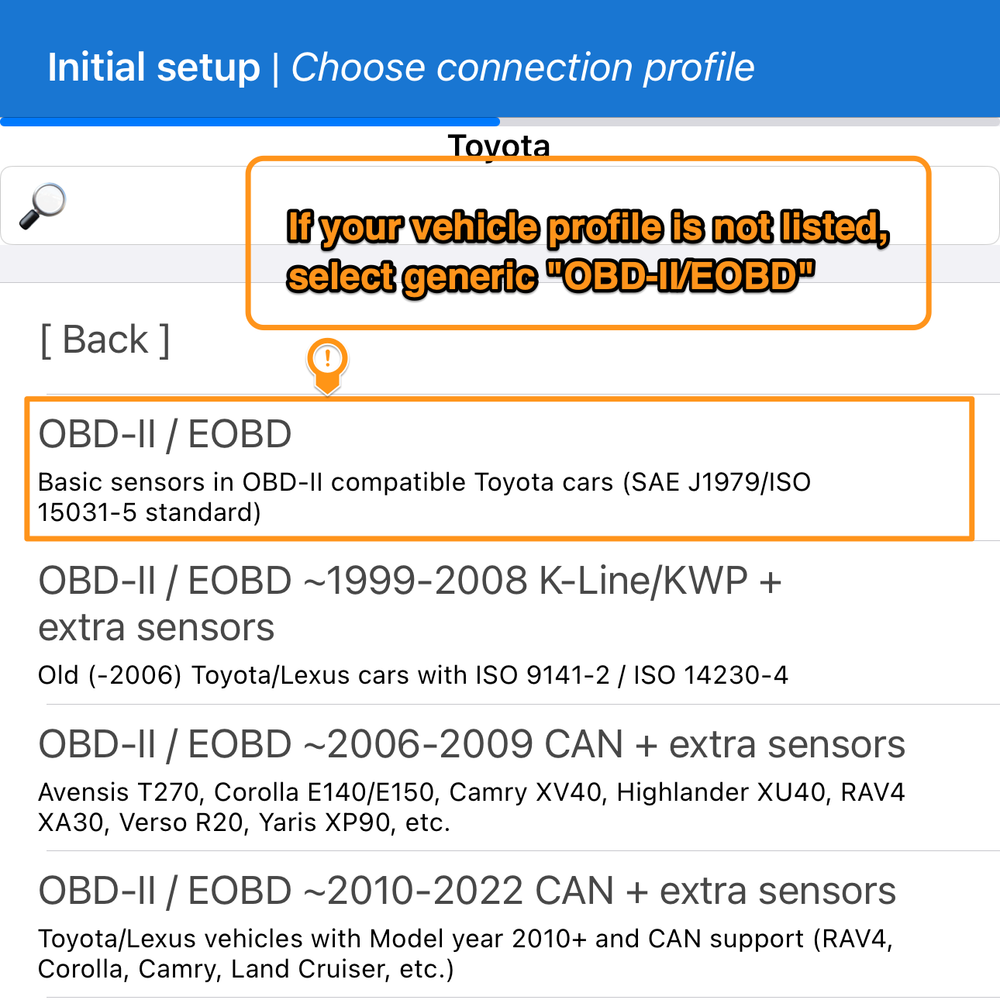
Next, you will go through a series of initial setup steps, including display language, app notifications, an introduction to the OBD2 Scanner, theme, and units. Continue until you have selected your vehicle's brand. At this point, you will need to choose the corresponding vehicle profile. If your specific vehicle profile is not listed, select the generic “OBD-II/EOBD” profile.
- Tip: The Car Scanner App has many profiles. Selecting the correct one may provide you with more data readings. However, if there is no suitable profile for your specific vehicle, please select the generic “OBD-II/EOBD” option.
Step 5: Finalize Setup and Connect
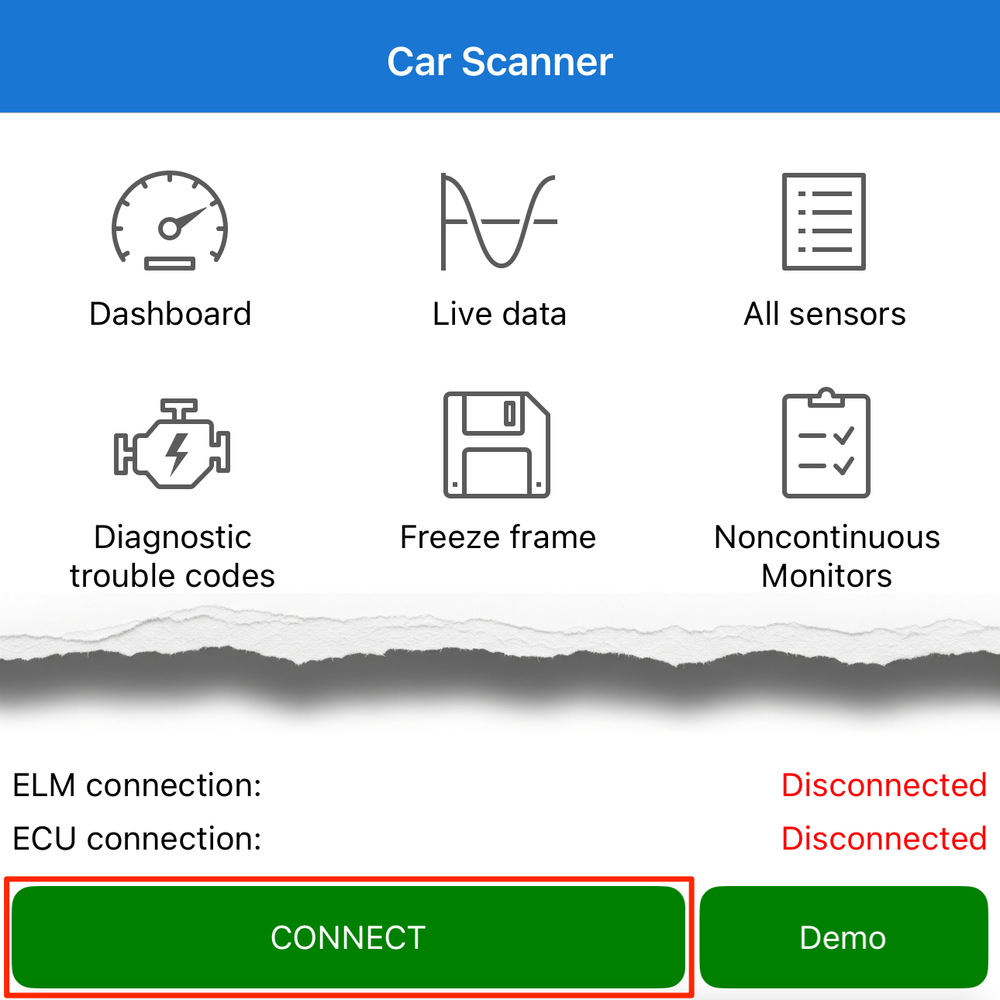
After the vehicle profile selection, you will encounter the Fuel Consumption settings. Completing this will finish the initial setup, and the app will return to the main dashboard. Tap the green “Connect” button at the bottom of the screen.
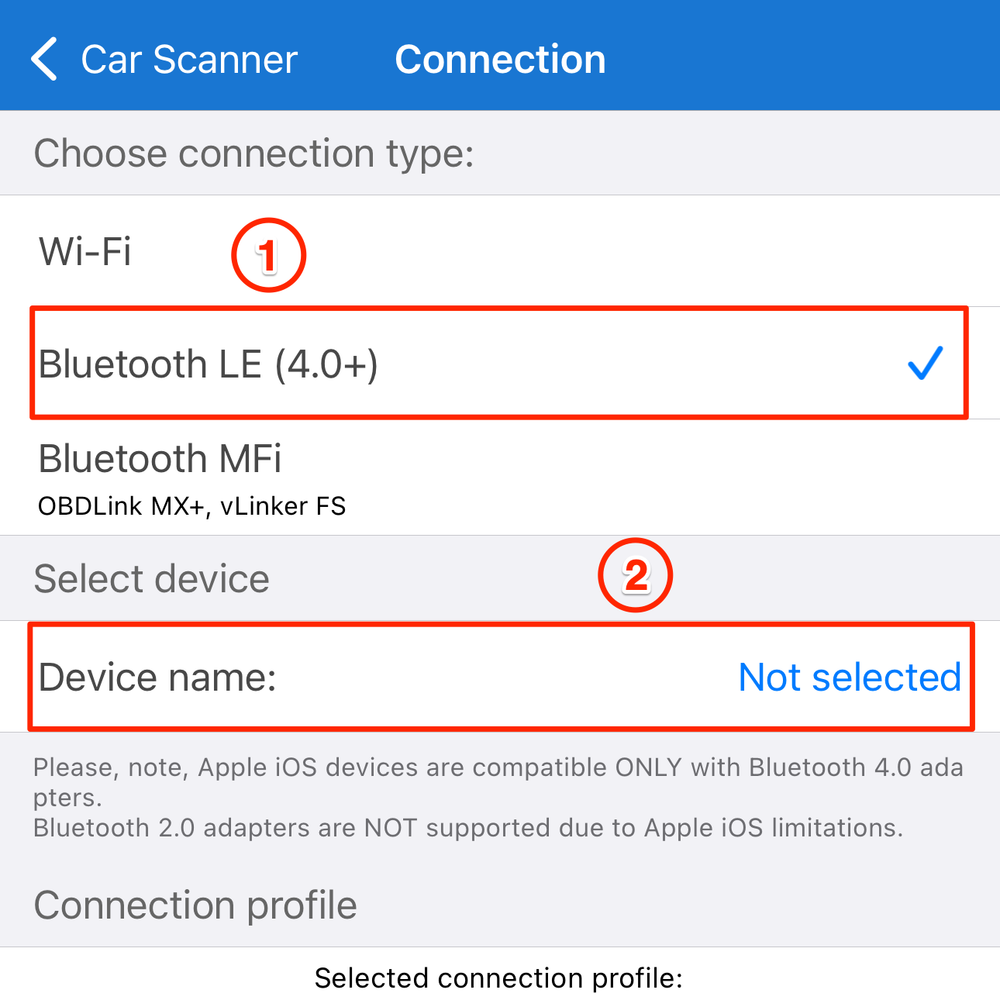
Step 6: Select Connection Type
The app will navigate to the “Connection” settings screen. Please select Bluetooth LE (4.0+) as the connection type, and then tap on "Device name".
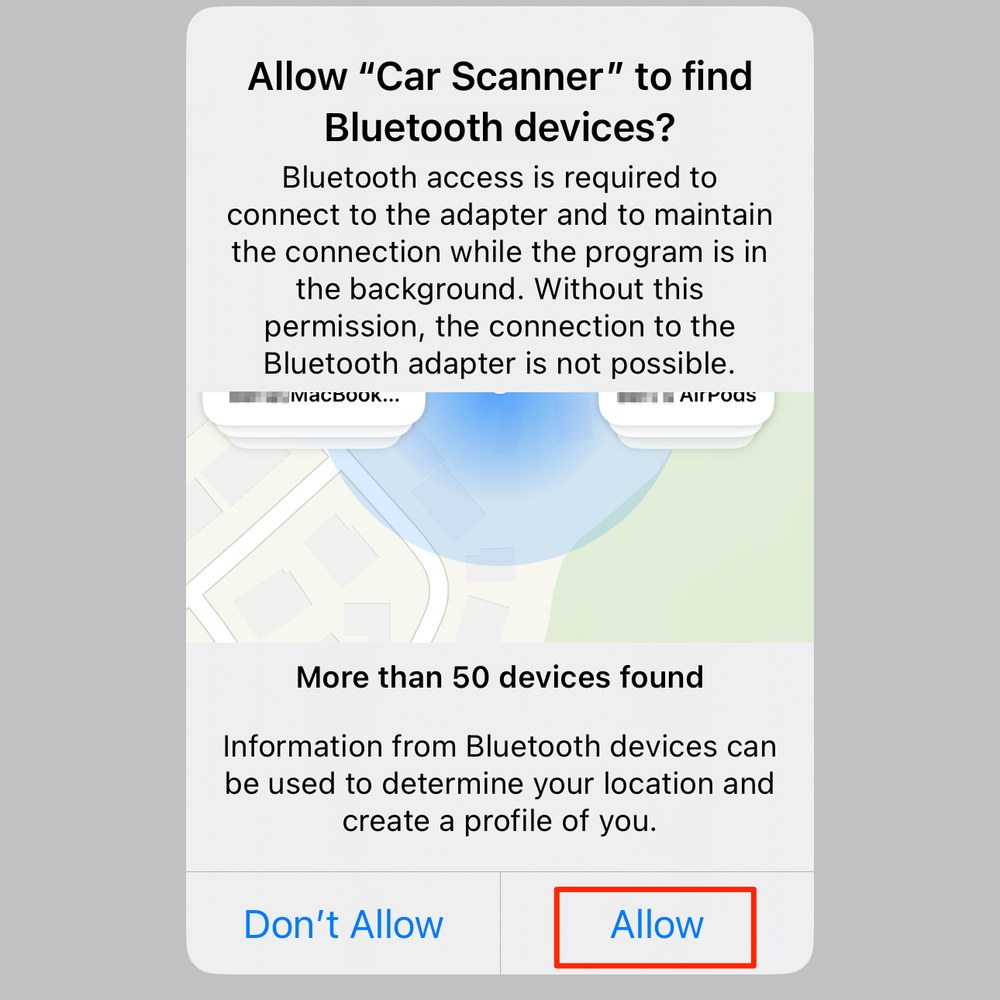
Step 7: Grant Bluetooth Permission
At this stage, you will be asked for Bluetooth permission. Please allow it so the app can access Bluetooth devices.
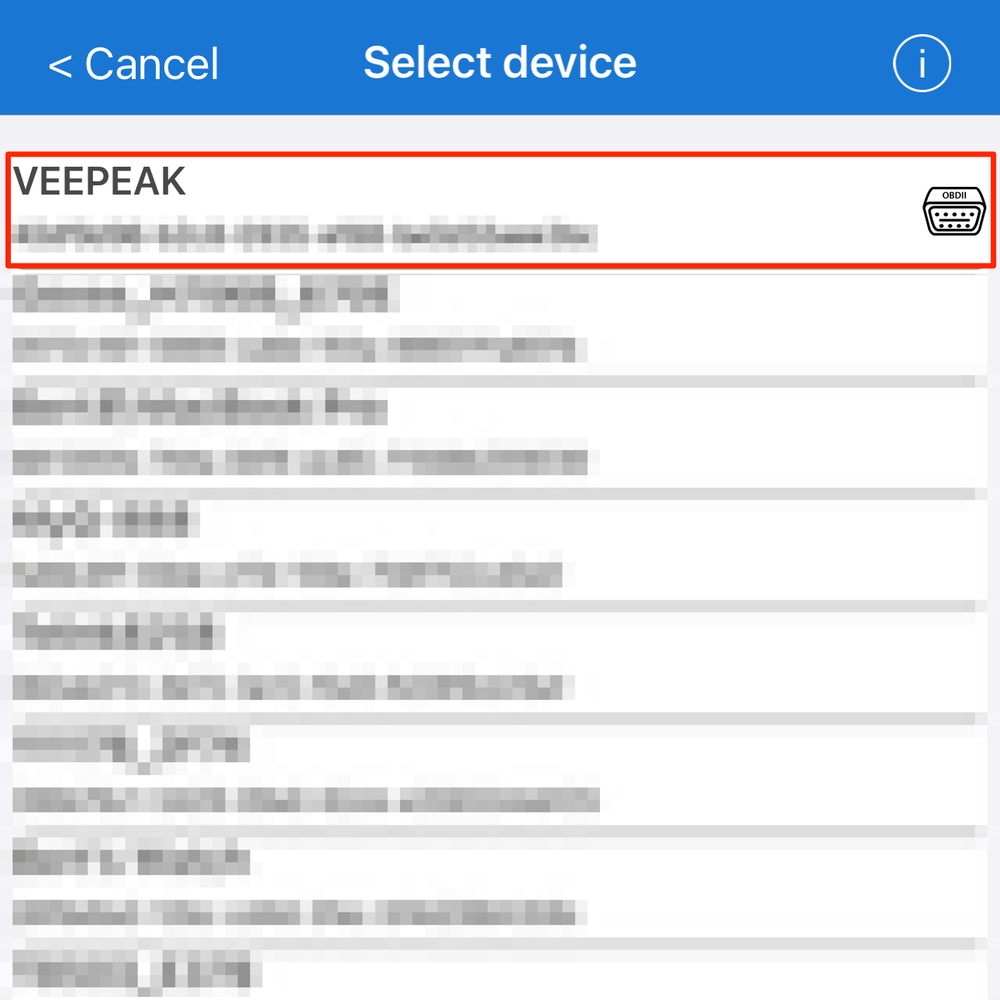
Step 8: Select "VEEPEAK" as Your Bluetooth Device
On the Bluetooth device list, select "VEEPEAK".
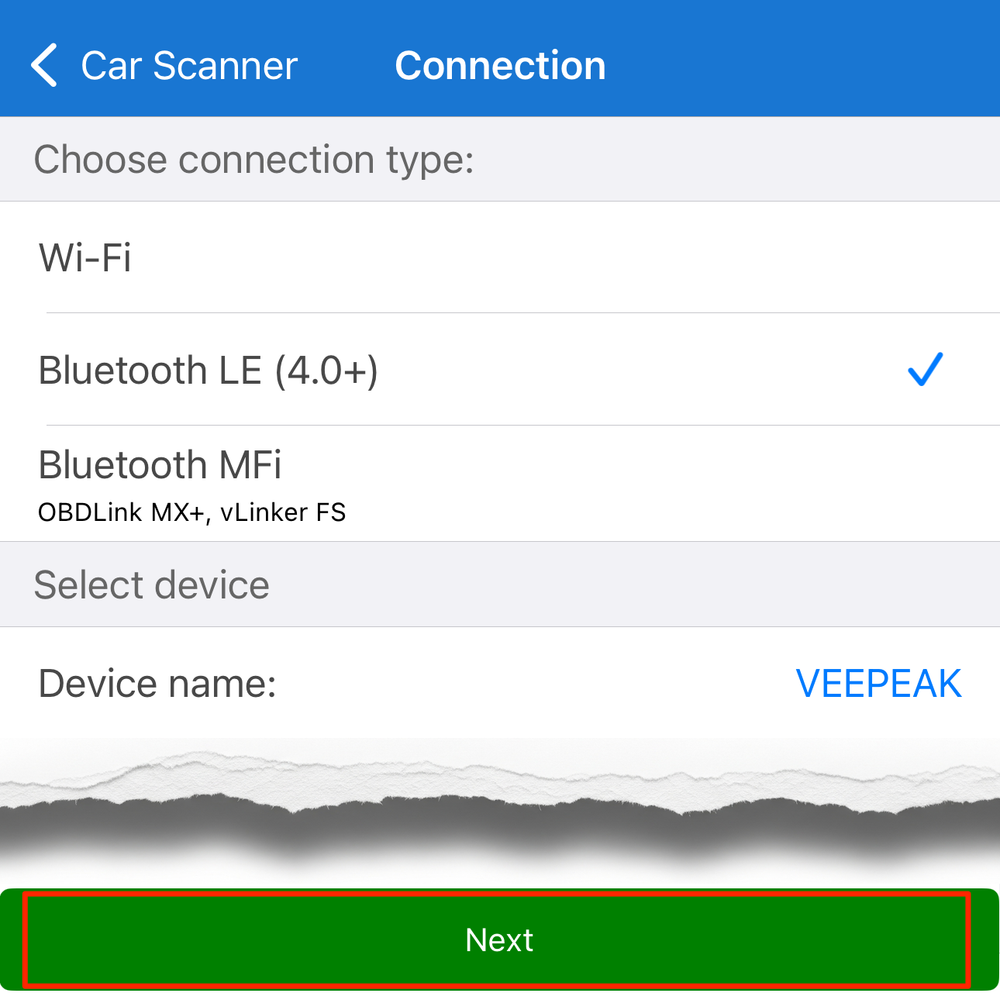
Step 9: Initiate Connection
After selecting the "VEEPEAK" Bluetooth device, the app will return to the Connection page. Click "Next". The App will then initiate the connection to the scanner and your vehicle.
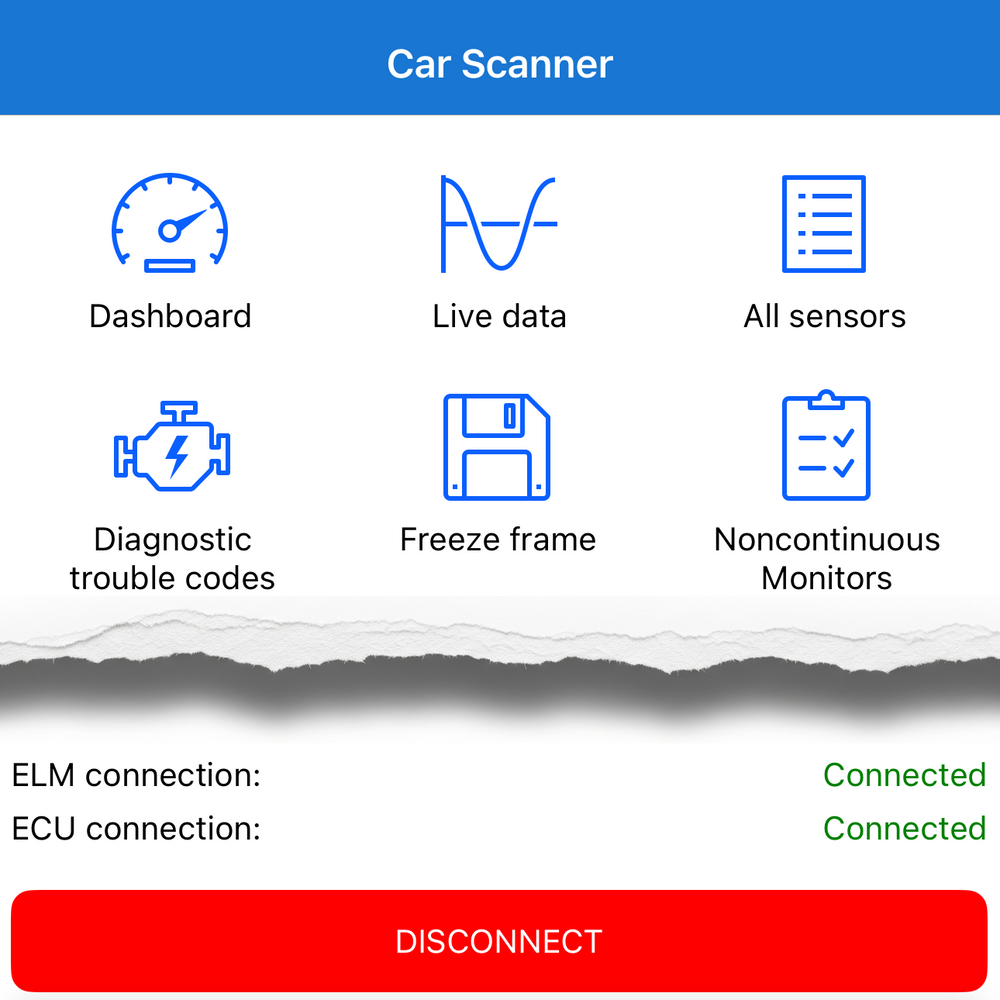
Step 10: Connection Successful
When both the ELM (the OBD2 device) and the ECU (the vehicle) are successfully connected, you can begin using the app.
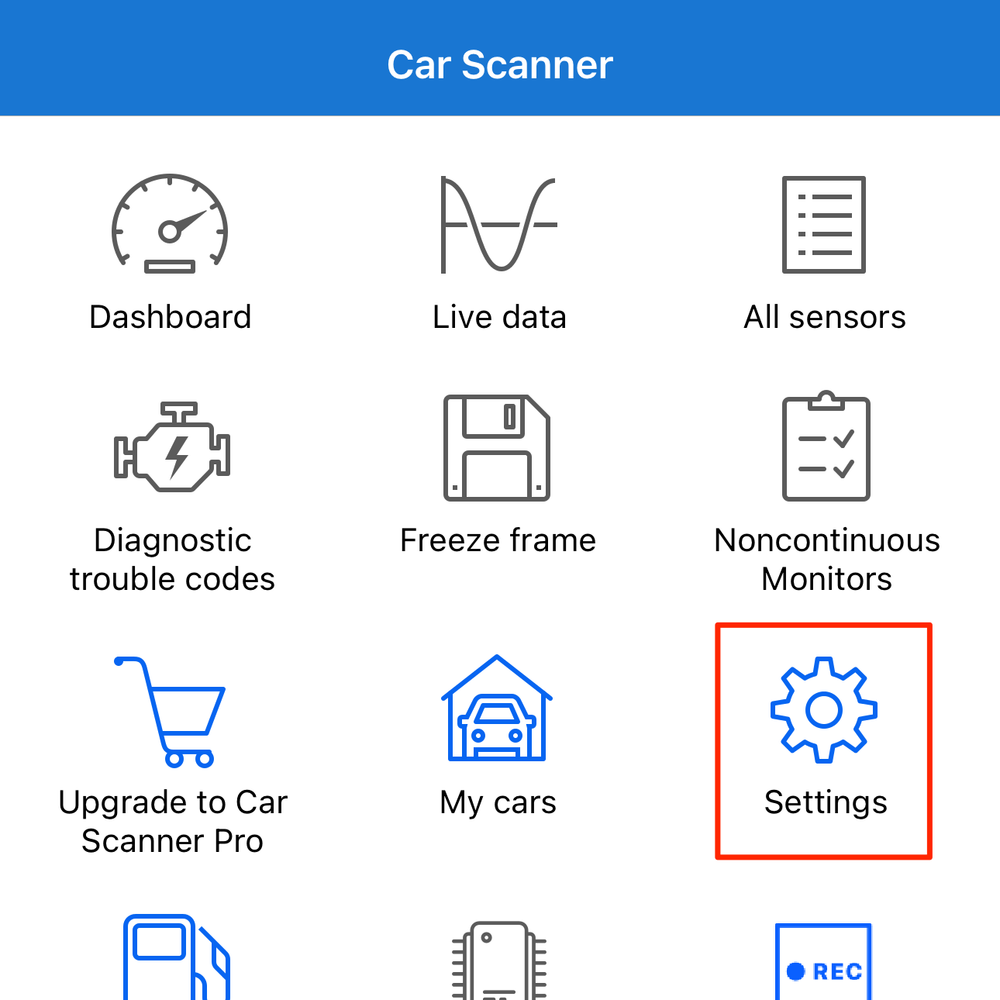
Step 11: Making Changes via Settings
If you accidentally skipped any steps during the initial setup, you can access the settings from the main dashboard by tapping the “Settings” icon to continue configuring the app.
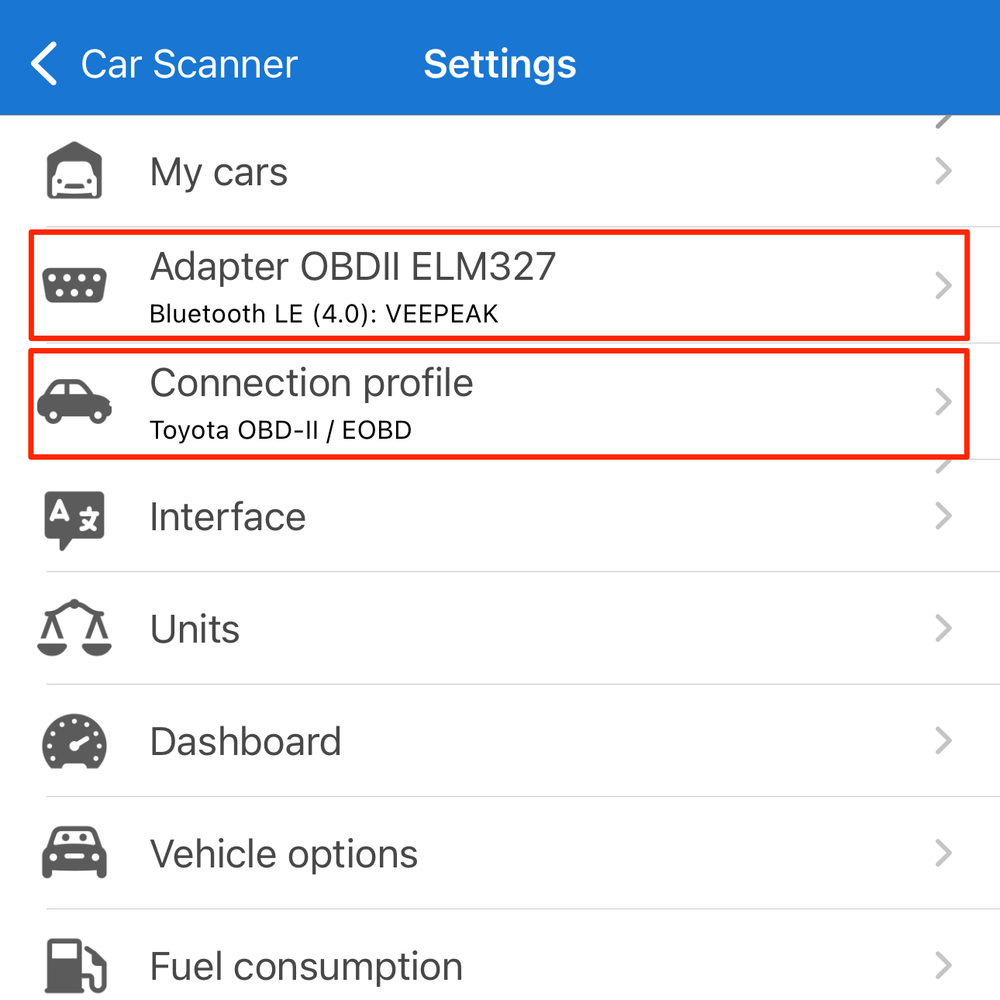
Step 12: Settings Menu Explained
In the Settings menu, you will see two relevant options:
- The first option, “Adapter OBD II ELM327”, allows you to configure the connection type and select the OBD2 Scanner. Refer to step 6 for guidance.
- The second option, “Connection profile”, is where you can select your vehicle's brand and profile. Refer to step 4 for guidance.
