How to Connect Car Scanner to OBDCheck BLE & OBDCheck BLE+ on Android
Getting started with your Veepeak OBD2 scanner is easy. This guide will walk you through the simple process of connecting your scanner to the Car Scanner app on your Android device. Follow these steps to set up your device and begin monitoring your vehicle's health.

Step 1: Plug In Device & Prepare Bluetooth
Plug the Veepeak scanner into your vehicle's OBD-II port. Turn the car's ignition to the "ON" position or start the engine.

Step 2: Download the Correct App
Search for and download "Car Scanner ELM OBD2" from the Google Play Store.
Note:
- The app offers optional in-app purchases. These fees are managed by the app developer and are not related to Veepeak.
- Search results may show ads for similar apps. Be sure to download the correct one.
Step 3: Initial App Setup
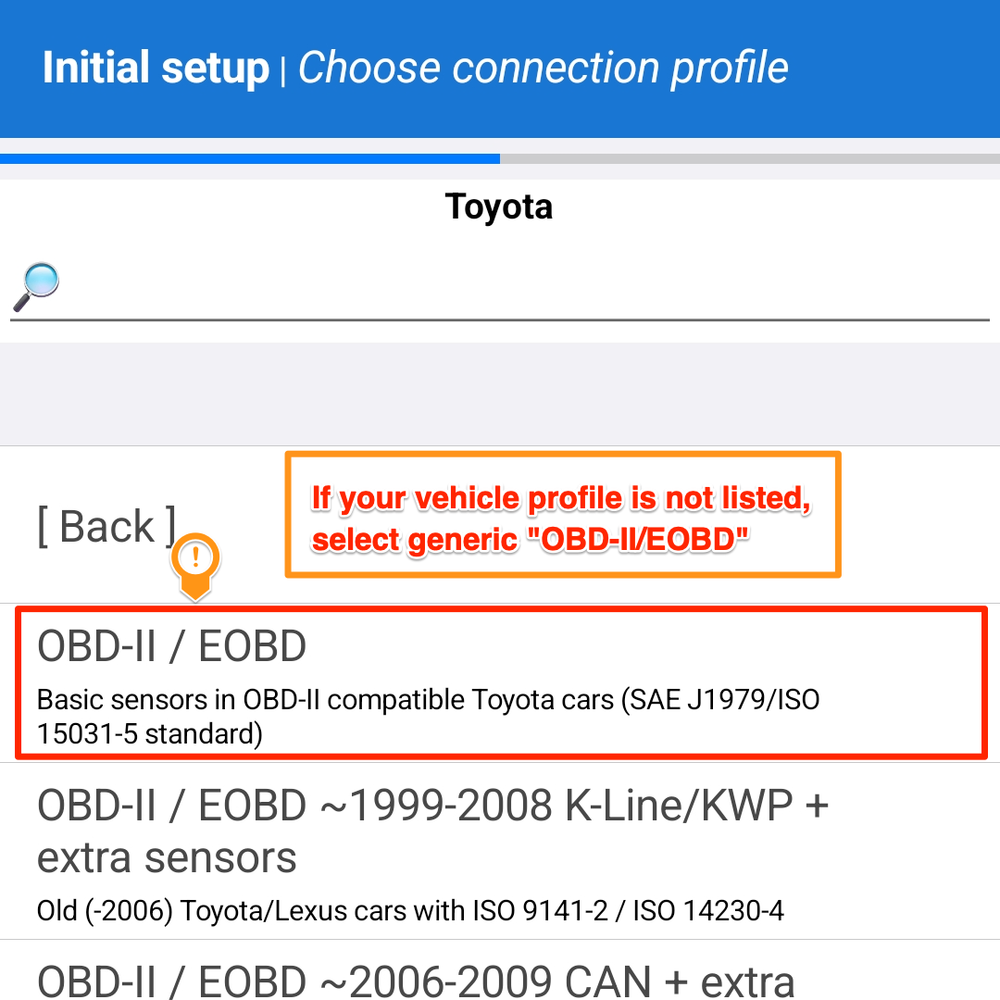
Open the Car Scanner app. You will be guided through a series of initial setup screens. Configure your preferences for language, notifications, theme, and units. When prompted, select your vehicle's brand and the corresponding vehicle profile.
Tip:
- The Car Scanner App has many profiles. Selecting the correct one may provide you with more data. However, if a profile for your specific vehicle is not available, choose the generic “OBD-II/EOBD” profile.

Step 4: Finalize Setup and Prepare to Connect
Configure the Fuel Consumption settings to complete the initial setup. The app will then return to the main dashboard. Tap the green “Connect” button at the bottom of the screen.
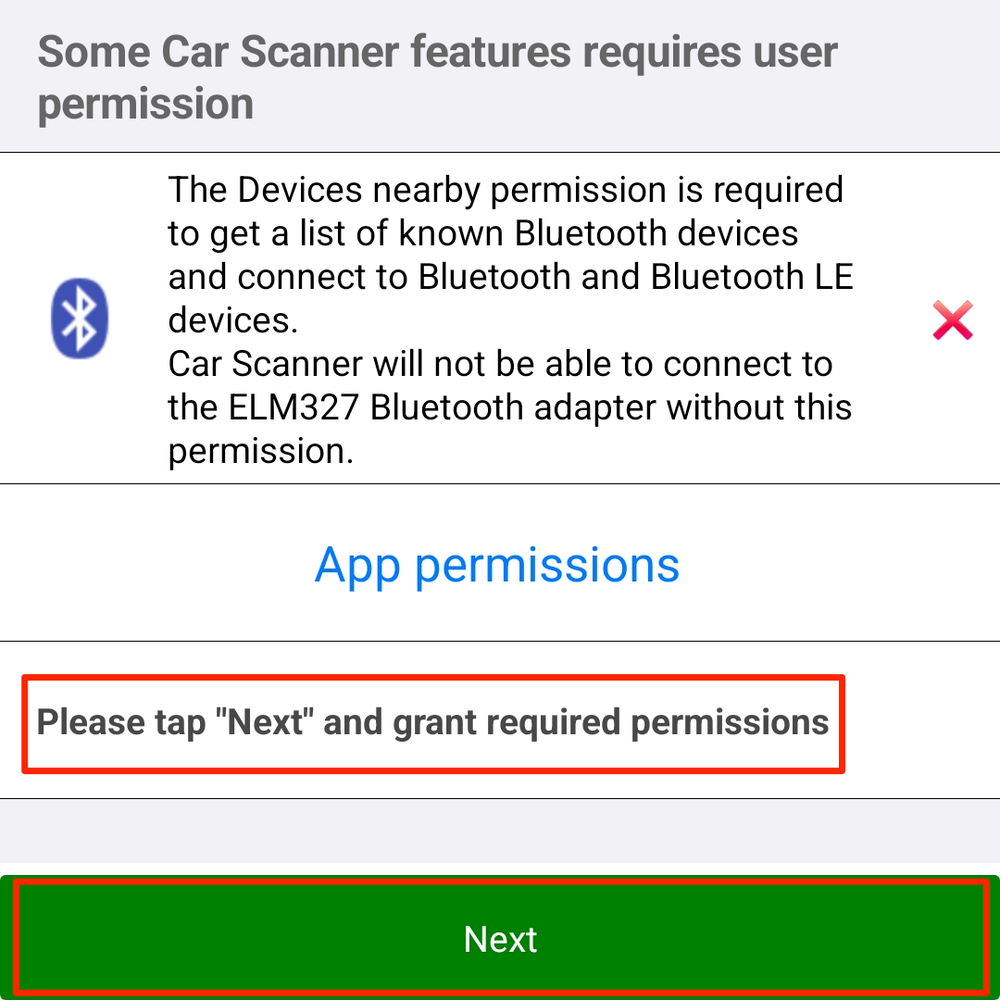
Step 5: Grant Bluetooth Permission
The app will now request Bluetooth permissions. Tap “Next” and then tap “Allow” in the system pop-up that appears. This permission is required for the app to connect to the scanner.
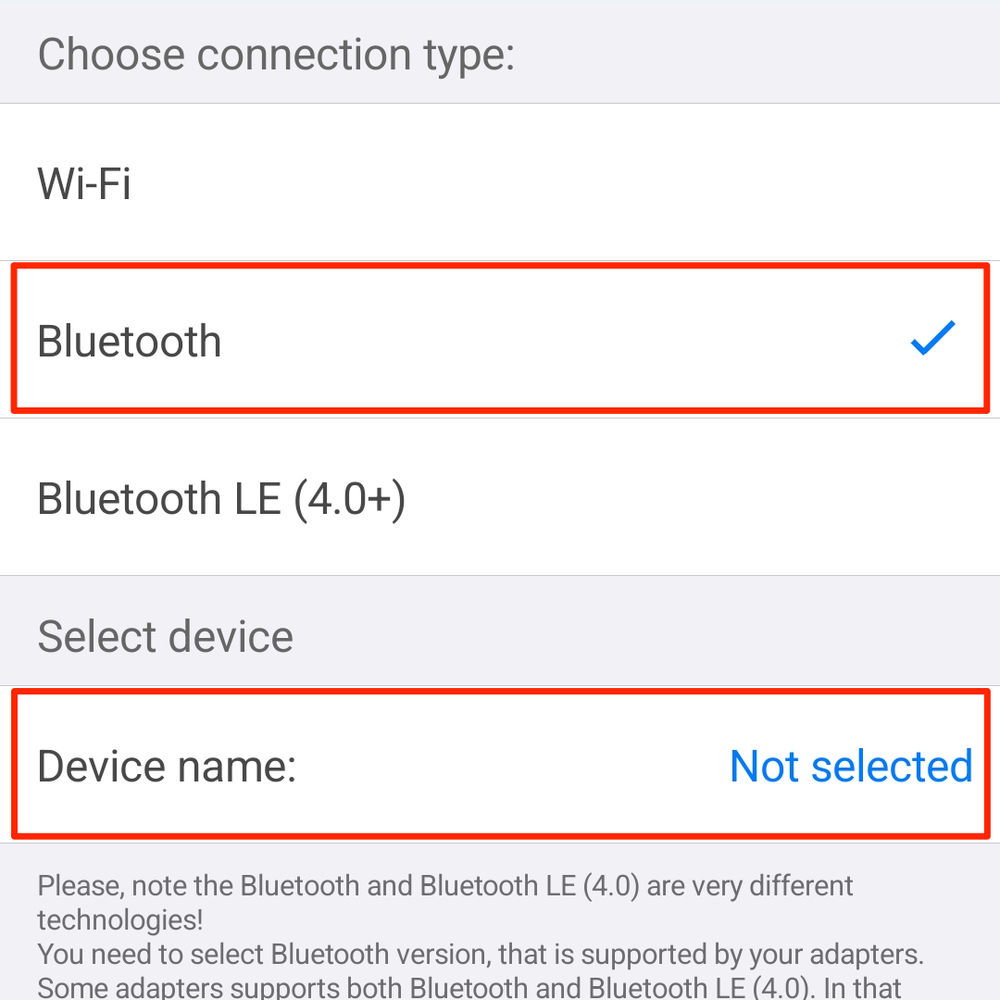
Step 6: Select Connection Type and Device
On the connection screen, follow these steps:
- Set the “Connection type” to “Bluetooth”.
- Tap on “Device name” and select “VEEPEAK” from the list.
- If this is your first time, a system pairing request will appear. Enter the PIN “1234” and confirm the pairing.
- After the device is selected, tap the green “Next” button. The app will return to the dashboard and begin connecting.
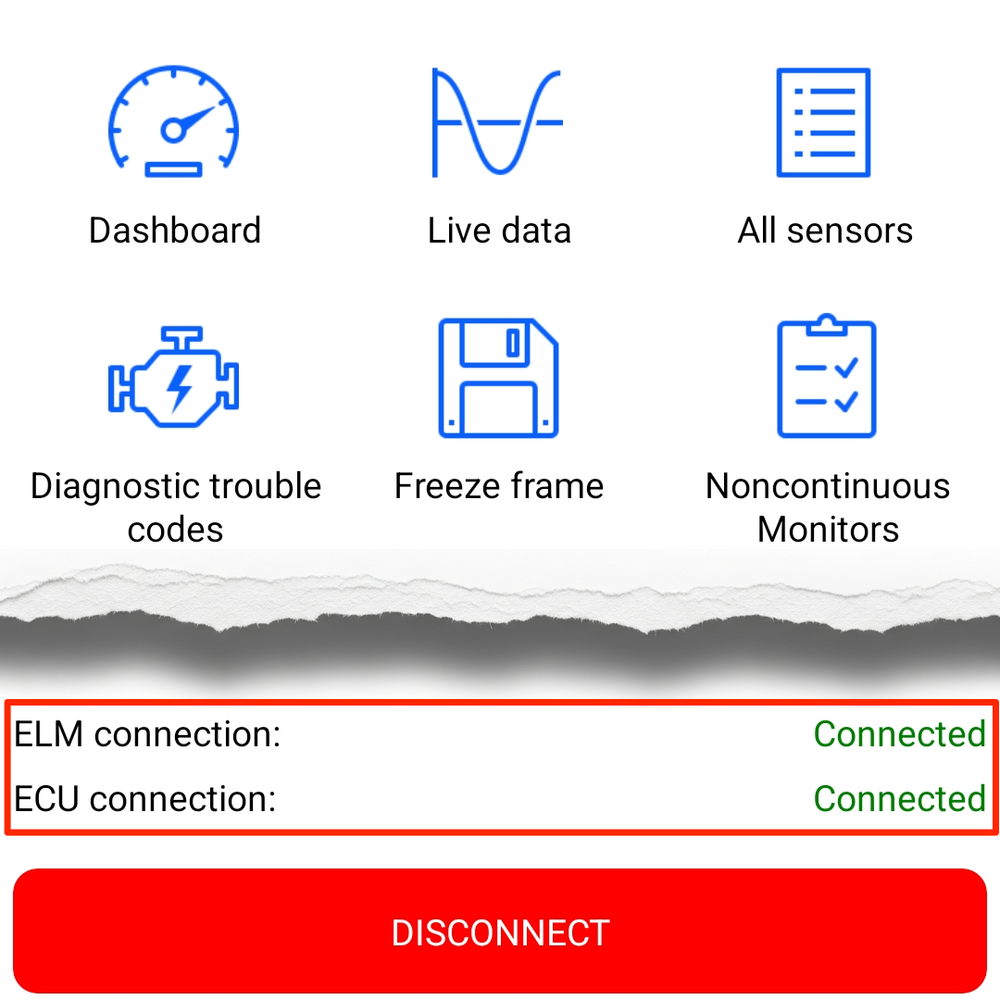
Step 7: Grant Notification Permission & Finish
Once connected, the app may ask for permission to send you notifications. Tap “Allow”. The app is now successfully connected to your scanner and ready for use.
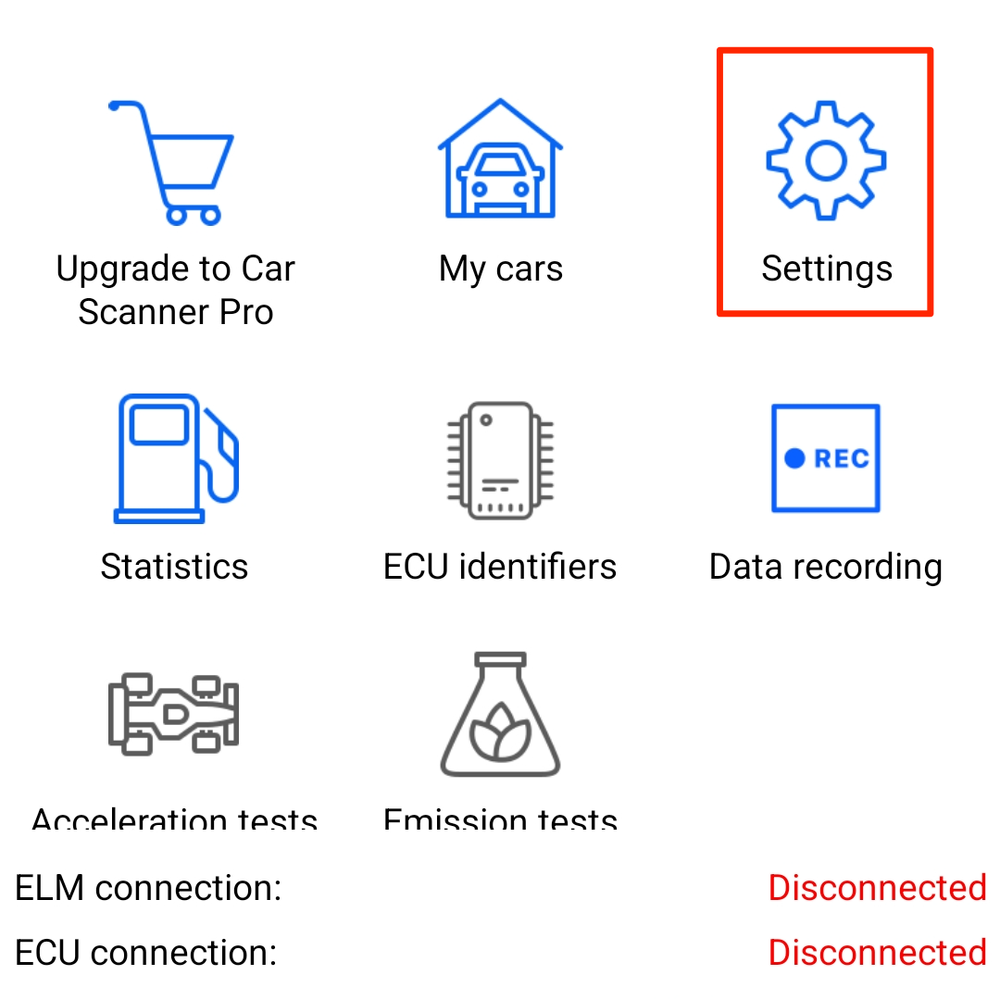
Step 8: Changing Settings Later
If you skipped the initial setup or need to adjust your settings later, you can access them by tapping “Settings” on the app's main dashboard.
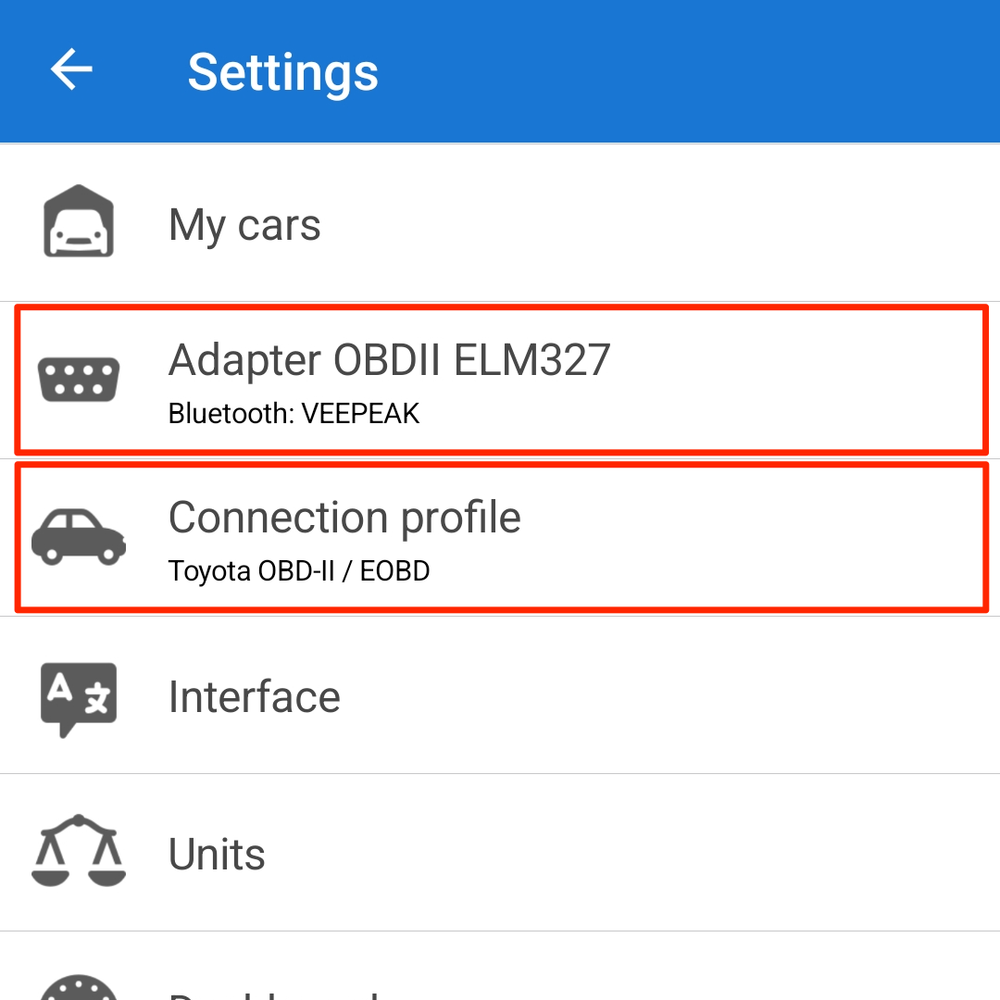
Step 9: Modifying Connection and Profile Settings
In the Settings menu:
- Go to “Adapter OBDII ELM327” to change your connection type or re-select the Bluetooth device (as described in Step 6).
- Go to “Connection profile” to change your vehicle brand and profile (as described in Step 3).
After making any changes, return to the main dashboard and tap “Connect” to use the scanner.
